The Internet Of Things (IoT) describes the network of physical
objects, so known as, "things" — that are embedded with sensors,
software, and other technologies that are used for the purpose of
connecting and exchanging data with other devices and systems over
the Internet.
Things have evolved due to the convergence of multiple
technologies, real-time analytics, machine learning, ubiquitous
computing, commodity sensors, and embedded systems. Traditional
fields of embedded systems, wireless sensor networks, control
systems, automation (including home and building automation), all
contribute to enabling the Internet of things. In the consumer
market, IoT technology is most synonymous with products pertaining
to the concept of the "smart home", including devices and
appliances (such as lighting fixtures, thermostats, home security
systems and cameras, and other home appliances) that support one
or more common ecosystems, and can be controlled via devices
associated with that ecosystem, such as smartphones and smart
speakers.
Check out some of our projects below to get inspired.
Internet of Things(IoT) using the ESP8266
Duration: 12 hours
IoT is not just a buzzword anymore, it is becoming increasingly in
demand, so if you are looking for a career change, great learning
opportunity, or just a fun and useful project, this course is for
you! Basics of electronics and programming will help, but not a
necessary requirement as all things will be covered from scratch.
Introduction
- What is IoT?
- Project Demo
- Parts we are going to use
- Software we are going to use
- Arduino a quick introduction.
- The ESP8266 board
- History lesson on ESP8266
Setting up your computer to programming
- Arduino IDE download
- Install and setup for ESP8266
- Using a button to switch an LED
Connecting to the Internet
- Testing your connection to the internet
- Understanding the client-server model
- Programming the client server model
Sending Temperature and Humidity to Adafruit.io
- DHT11
- Getting Temperature and Humidity of the room
- Posting the Temperature and Humidity on the web server
- Posting the value to Adafruit.io
Creating a Weather station
- Getting data from Open Weather Maps
- Getting Temperature, Humidity of Mumbai, India
- Displaying the temperature and Humidity on the web-server
Using the Blynk App
- Installing Blynk app on your smartphone/li>
- Create a Blynk Account and design the UI
- Installing Blynk Libraries for Arduino IDE
-
Programming in the IDE to send temperature and humidity to Blynk
app
Going Further
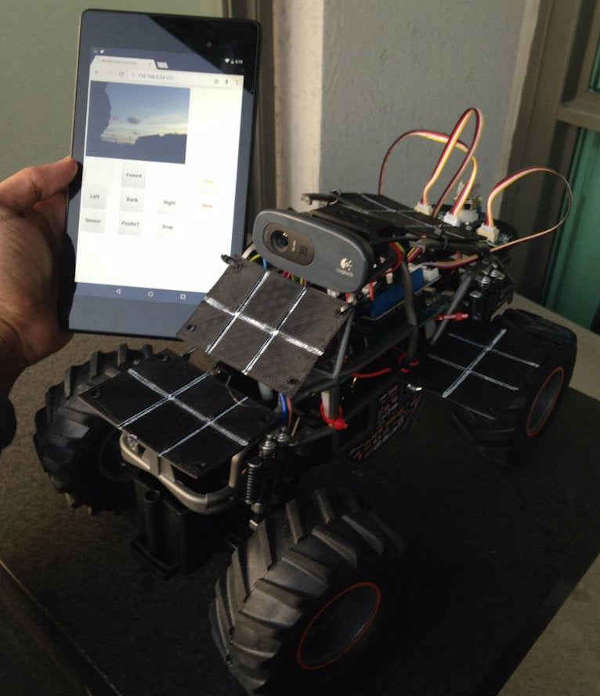
- Controlling a Robot using a web app
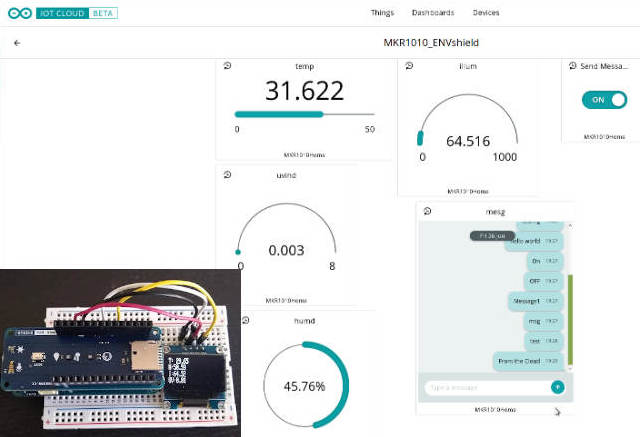
- Arduino IoT platform
- AWS IoT
- Azure IoT
- Mesh Network
- Quick Intro to LoRa
- Why 5G?
More Demos of interesting projects, if time permits.
Price: Rs 1200 per student, for a minimum of 10 students
Please note, the price for the two-day workshop does NOT include
refreshments, and space to conduct the workshop. As a suggestion
for the Workshop space, and something that has worked in the past,
is to have your parents/guardian speak to the school
teacher/principal to get the computer lab for the weekend/holiday.
In addition, this price is available only for Goa, for neighboring
States please get in touch via email.
Hardware Required - cost approximately Rs 1000
Here is the list of Hardware required, if you plan on doing the
practicals in the Workshop, a suggestion here is to have at least
2/3 students contribute and buy the hardware.
- Generic ESP8266 Nodemcu
- Breadboard
- USB cable for Programming board
- 1 DHT11 or LM35 temperature sensor
- 2 Photo Resistors
- 2 Push Buttons
- Male to Male jumper cables 20 numbers
Internet of Things(IoT) using the Raspberry Pi
Duration: 12 hours
IoT is not just a buzzword anymore, it is becoming increasingly in
demand, so if you are looking for a career change, great learning
opportunity, or just a fun and useful project, this course is for
you! Basics of electronics and Python programming will help, but not a
necessary requirement as all things will be covered in detail from scratch.
Introduction
- What is IoT?
- Project Demo
- Parts/Hardware we are going to use
- Software we are going to use
- What is the Raspberry Pi?
- A quick history of the Raspberry Pi
-
What is the difference between Micro-controller and
Microprocessor?
Setting up the Raspberry Pi for the first time
- Download the Operating System (OS) and Flash SD card
- Your OS options
- First boot
- Connecting to WiFi Network
- Configuring Raspberry Pi
Familiarize yourself with Raspbian OS
- Updating Raspi-config options
- UI applications
- Navigation and File System
- Enabling Secure Shell and Virtual Network Computing
- File Transfer (FTP)
- Linux Command line
- Install & Update Software
- Create, Remove and Manipulate files
- Using Nano instead of Python IDLE
- A few more commands
Python Programming
- Using the Python Development environment – Thonny IDE
- Variables and Data Types
- Comparison Operators
- Conditions
- Loops
- List
- Methods and Functions
- Error and Exception handling
- Installing Python modules
- Using existing Python modules
Electronic Engineering Basics
- Ohm's Law
- What is a Breadboard?
- Understanding Circuit
- Resistors - Series vs. Parallel
- Reading the value of a Resistor
- Voltage Dividers
- Diodes for Polarity protection
- LED’s make it blink
- Different types of LEDs
- Switches/Buttons
- Internal pull up resistor
- Debouncing in software
- Slide switch
- Potentiometer
- Using a Multimeter – you need one for your home.
Blinking LED when button is pressed
- Understand Raspberry Pi GPIO
- Blinking an LED using Python
- Blinking and LED when button is pressed
- Getting the value of a light sensor
Sending Temperature and Humidity to the web
- DHT11 sensor
- Getting Temperature an humidity of the room
- Setting up ThingSpeak/Adafruit.io
- Installing packages required
- Writing a python program to post Temperature and Humidity
Going Futher
- Posting Sensor data to Google Sheets
- Creating a local web App on your Pi to display sensor data
- Using Gas Sensors
- Quick Intro to LoRa
- Looking at Arduino IoT
- AWS IoT
- Azure IoT
Price: Rs 1200 per student, for a minimum of 10 students, please inquire about a discount if you have taken one of are Raspberry Pi Workshops
Please note, the price for the two-day workshop does NOT include
refreshments, and space to conduct the workshop. As a suggestion
for the Workshop space, and something that has worked in the past,
is to have your parents/guardian speak to the school
teacher/principal to get the computer lab for the weekend/holiday.
In addition, this price is available only for Goa, for neighboring
States please get in touch via email.
